Tools & Materials
- Grass Seed
- Starter Fertilizer
- Garden Rake
- Topsoil
- Shovel
- Hand-Held Spreader
- Hose
- Spray Nozzle
Intro / Video Transcript
Bare spots on your lawn can be caused by a variety of factors, like over-fertilizing or lack of water. Maybe you spilled some weed killer on it the last time you were treating those dandelions or filled up your mower. Whatever the cause was, the cure is to re-seed it and get grass growing again. Reseeding a bare spot of grass on your lawn is a relatively easy project that anyone to do in just a few minutes. All it takes is the right seed, some starter fertilizer and some basic soil preparation.
Bare spots on your lawn can be caused by a variety of factors, like over-fertilizing or lack of water. Maybe you spilled some weed killer on it the last time you were treating those dandelions or spilled some gas on it when you filled up your mower. Whatever the cause, the cure is to re-seed it and get grass growing again. Reseeding a bare spot of grass on your lawn is a relatively easy project that anyone to do in just a few minutes. All it takes is the right seed, some starter fertilizer and some basic soil preparation.
Today, we’re going to seed this bare spot using some tried and true methods. We’ll start by amending the soil and then applying the proper seed for the amount of sun the area gets. We’ll also apply some starter fertilizer to get our seeds germinating quickly. So let’s get started.
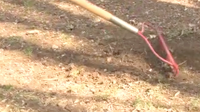
The first thing we’ll do is to break up the soil. You can use a variety of garden tools to break up the top couple of inches, include a garden rake, or a shovel. This hand-held cultivator also does a nice job. You don’t have to dig too deep. Just the top couple of inches.
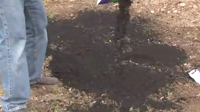
Once the soil is broken up, it’s a good idea to add some topsoil, especially if you have heavy clay soil like we’re working with. You can spread it with a shovel, or just dump the bags directly onto the bare spot. Three bags should do it. Now, we’ll mix it in with our garden rake, spreading it over the entire spot. When used upside down, the garden rake also helps smooth out the soil. Now it’s ready for seed.
Today, we’re going to be using a seed designed for dense shade. We’ll be applying it with a hand-held spreader, so we need to read the back of the seed bag to determine the proper setting for the spreader. Now we’ll set the spreader to the proper setting for our seed.
To spread the seed, simply pull the trigger and turn the crank handle. This spreader operates on the same principle as larger broadcast spreaders. The crank turns the broadcast wheel which disperses the seed evenly. Be sure to cover the area completely with seed.
While the seed could probably germinate and grow on its own given the right conditions, we’re going to give it a little insurance by using this starter fertilizer, which is designed for use when planting grass seed. Like the seed, we’ll consult the back of the bag for the proper spreader setting. Once we find the right setting, we’ll make the adjustment on our spreader.
Pour the starter fertilizer into the spreader’s hopper, being careful not to spill any of it. Then, spread it thoroughly over the area. This hand-held spreader makes it easy to get just the right amount of seed and fertilizer in just the right spot. It also keeps you from having to spread it by hand, which is less consistent.
Now, we’ll gently mix the seed and the starter fertilizer into the soil with our garden rake. This will help ensure that the seed is mixed in with the soil. Maximizing the contact between seed and soil is critical to getting the grass growing. This final spreading step also makes sure the area even, with no mounds or depressions in the soil.
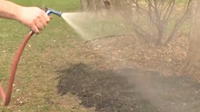
The next step is perhaps the most important one. Water. New grass seed needs to be watered immediately, and then on a regular basis for the first week to 10 days. Don’t overwater the area, though. This could wash away the seeds and all your hard work. Just give it a light watering three times a day for a couple minutes. Then, when the grass starts growing, water it once a day for 15 to 20 minutes.
There you have it. In just a week or so you’ll see grass seed start sprouting. Just be sure to keep the patch wet by watering frequently.
If you have questions about this or any other home improvement project, be sure to read our list of Frequently Asked Questions for this video. And be sure to print out our Project Instructions, which includes a Tools and Materials checklist, before visiting your local independent home improvement retailer. That’s where you’ll find all the products and helpful advice to complete your project. If you’re not sure where to find your local store, check out our Store Locator.
Good luck with your project and thanks for watching.
Steps
- 1.

Break up the dirt with various garden tools.
- 2.

Add top soil if your dirt is mostly clay.
- 3.

Choose the right type of grass seed depending on shade density and spread onto the dirt patch.
- 4.

Cover area completely with seed.
- 5.

Add starter fertilizer over the area.
- 6.

Spread everything around until seeds are mixed into the soil.
- 7.

Water right away. Continue to lightly water three times a day for 7-10 days. Then water once a day when the grass starts growing.
